For internal knowledge sharing the local blog server is installed and configured.
Step 1
If it's a fresh server then update once.
yum update -y
then start installed required dependencies packages for that.
yum install httpd mysql-server php php-mysql php-curl php-gd php-pear php-memcache php-pspell php-snmp php-xmlrpc -y
Now start the service and enable it to start automatically in reboot.
systemctl start httpd ; systemctl enable httpd
systemct start mysqld ; systemctl enable mysqld
Step 2
Configure the mysql with following command with your requirement.
mysql_secure_installation
then create a database and user in mysql
mysql -u root -p
create database joomla;
create user joomla@localhost identified by 'Joomla@123';
grant all privileges on joomla.* to joomla@localhost;
flush privileges;
exit
Step 3
Download the package of Joomla from this link
wget http://joomla addresss/file.zip
now unzip the files to /var/www/html
unzip Joomla_3-8.6-stable-full_package.zip -d /var/www/html/
Now change the owner to apache for all the files.
chown apache:apache /var/www/html/ -R
chmod -R 775 /var/www/html/
Now restart the httpd service.
systemctl restart httpd
Step 4
Open the url in your browser
http://192.168.0.1
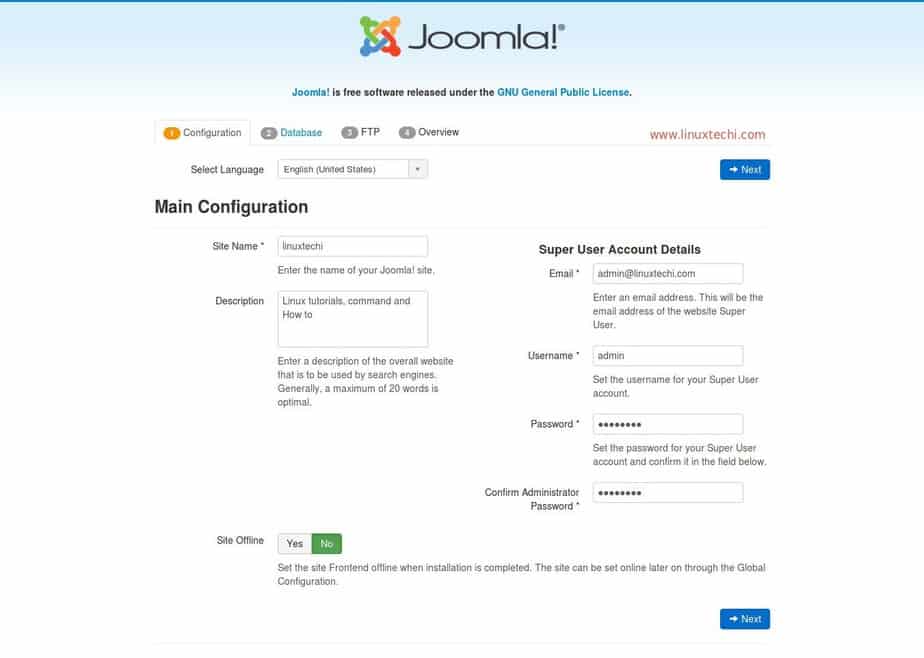
Fill all the required and click next
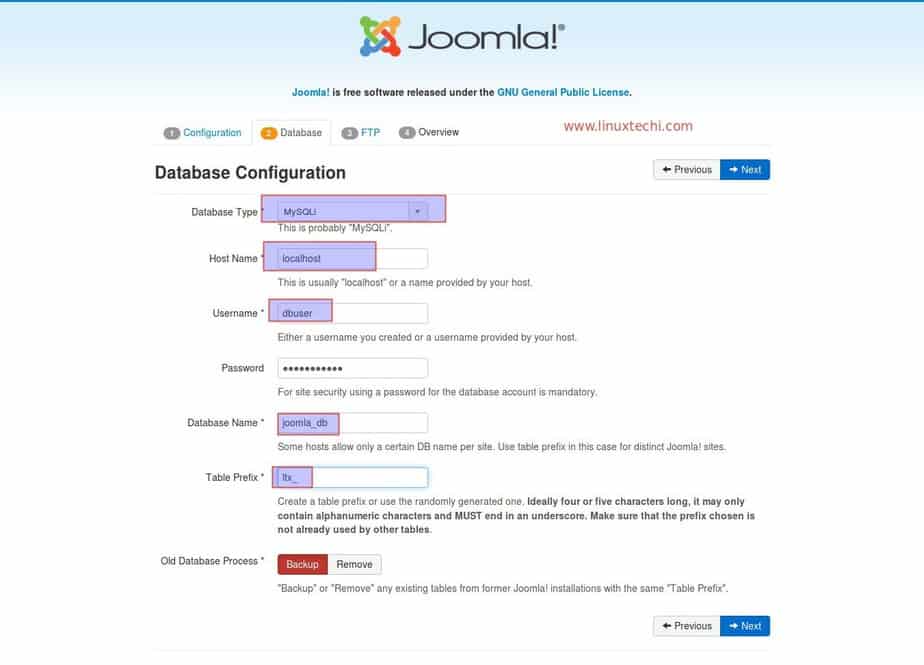
Fill the DB details and click next
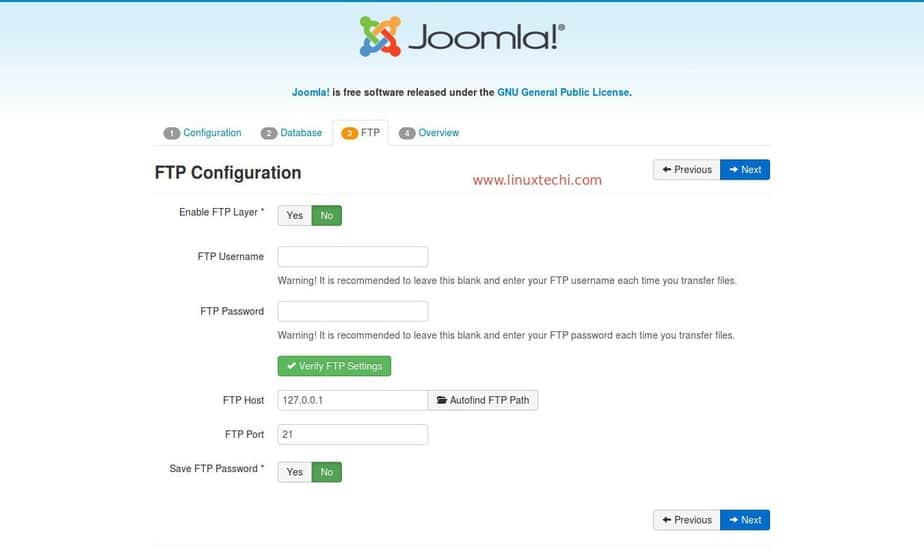
If required fill or else click next
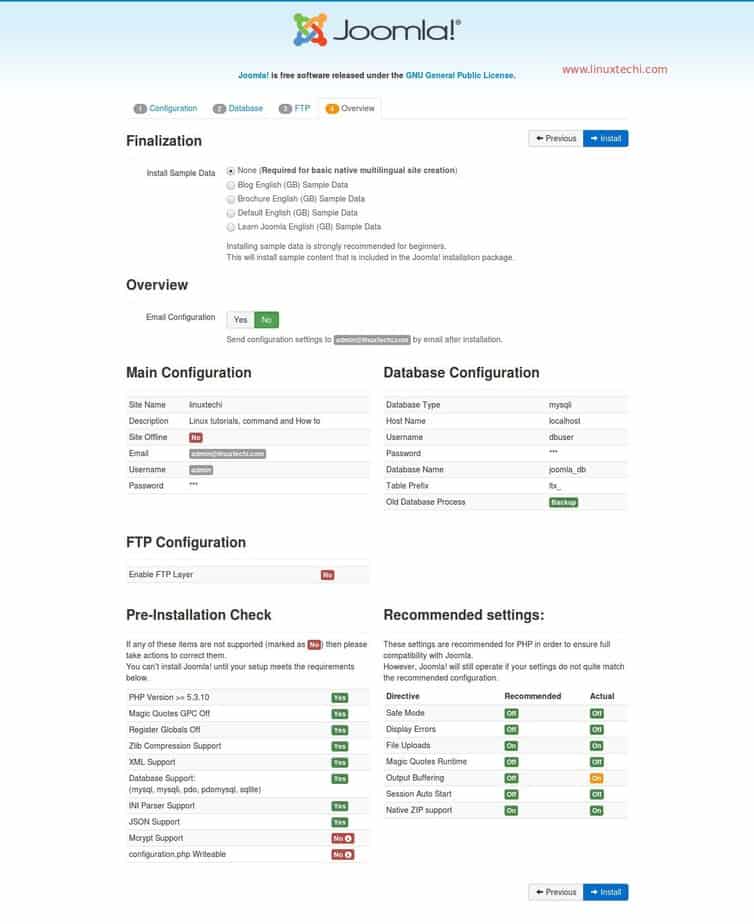
Now if you want sample data click any of that your choice or else click install
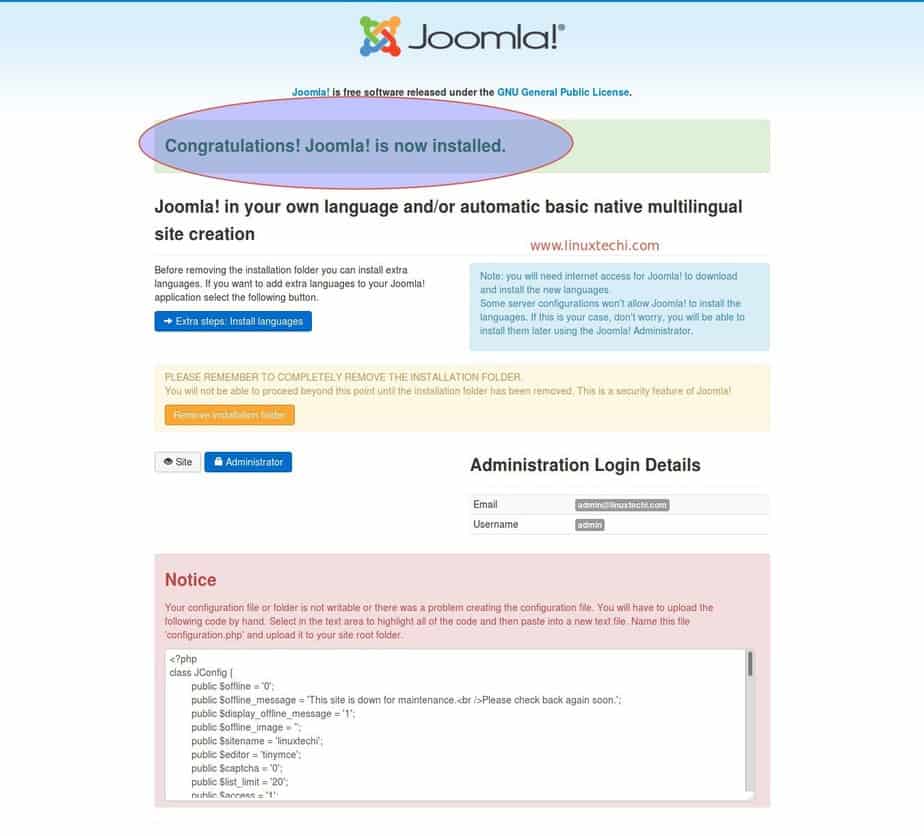
After this click remove installation folde and click Administrator button that shows in locked symbole.
That's all you can start using your blog.
Step 1
If it's a fresh server then update once.
yum update -y
then start installed required dependencies packages for that.
yum install httpd mysql-server php php-mysql php-curl php-gd php-pear php-memcache php-pspell php-snmp php-xmlrpc -y
Now start the service and enable it to start automatically in reboot.
systemctl start httpd ; systemctl enable httpd
systemct start mysqld ; systemctl enable mysqld
Step 2
Configure the mysql with following command with your requirement.
mysql_secure_installation
then create a database and user in mysql
mysql -u root -p
create database joomla;
create user joomla@localhost identified by 'Joomla@123';
grant all privileges on joomla.* to joomla@localhost;
flush privileges;
exit
Step 3
Download the package of Joomla from this link
wget http://joomla addresss/file.zip
now unzip the files to /var/www/html
unzip Joomla_3-8.6-stable-full_package.zip -d /var/www/html/
Now change the owner to apache for all the files.
chown apache:apache /var/www/html/ -R
chmod -R 775 /var/www/html/
Now restart the httpd service.
systemctl restart httpd
Step 4
Open the url in your browser
http://192.168.0.1
Fill all the required and click next
Fill the DB details and click next
If required fill or else click next
Now if you want sample data click any of that your choice or else click install
After this click remove installation folde and click Administrator button that shows in locked symbole.
That's all you can start using your blog.