Wednesday, 22 August 2018

How to add larger than 2TB HDD in Linux

Step 1 

Check the partition label with fdisk command 

fdisk -l 


Step 2 

Now we need to use that in parted command to create partition

parted /dev/sda


Now set the partition table format as gpt with below command

mklabel gpt


Now assign primary partition and assign capacity of the disk with below command

mkpart primary 0GB 4000.8GB


Step 3

Now check the partition that we have created in fdisk

fdisk -l

Now format it with below command

mkfs.ext4 /dev/sda1 


 Now we can mount that partition with below command

mount /dev/sda1 /USB_DISK

 
and also add the same in /etc/fstab 

/dev/sda1               /USB_DISK               ext4    defaults        0 0


 Now check the mounted partition with df command

df -h


Wednesday, 11 July 2018

Couch installation with source code

Step 1

Install required packages for couchdb for manual installation.

yum install autoconf autoconf-archive automake curl-devel help2man js-devel libicu-devel libtool perl-Test-Harness -y

if any fails then install epel install that failed dependencies.

yum install epel-release

Step 2

Download the erlang  rpm package cause source is not working perfectly to me so i decide to install rpm.

wget https://packages.erlang-solutions.com/erlang/esl-erlang/FLAVOUR_1_general/esl-erlang_19.3.6-1~centos~6_amd64.rpm

now run the below command to start install. 

Note: couchdb is required 20 or below erlang 

rpm -Uvh  esl-erlang_19.3.6-1~centos~6_amd64.rpm

Step 3

Now download couchDB from the source

wget https://archive.apache.org/dist/couchdb/source/2.1.1/apache-couchdb-2.1.1.tar.gz

untar the package with following command

tar xzf apache-couchdb-2.1.1.tar.gz

after that goto that directory and start configure it. 

Note: there is no need of prefix or anything else in above 2.0 version it will load the package in rel in the configuration folder.

 cd apache-couchdb-2.1.1

 now run the command below mention to configure.

./configure

then run make

 make

and then run make release it will do the mail installation.

make release


if you  face any issue on this just install couchdb with yum and try it will work.

now couchdb installed successfully. we can move the directory to any where to start.

mv apache-couchdb-2.1.1/rel/couchdb /opt


start the couchdb from bin directory with below command

./couchdb &

Step 4

If we have multiple couchdb on same server then we need to made one change vm.args in couchdb/etc location. I have mentioned it below.

# Multiple CouchDBs running on the same machine can use couchdb1@, couchdb2@,
# etc.
-name couchdb1@127.0.0.1


after that try to run the both couchdb in same server.

Step 5

For create noramal user we can use the below details.

click the users in database like screenshot below


Then click Click Document


It will show like below screenshots


and add the below details on it


{
"_id": "org.couchdb.user:readonly",
"name": "readonly",
"password": "readonly",
"roles": [],
"type": "user"
}
then add the users to database in permission tab.

Tuesday, 17 April 2018

CouchDB replication in command line

Here I have mentioned the command line replication method only.

curl -X POST -d ‘{“source”:”https://username:password@sourceIP:6984/databasename”,”target”:”http://username:password@targetIP:5984/databasename”}’ https://username:password@sourceIP:6984/_replicate -H ‘Content-Type: application/json’

We can you http and https which we required in that filed.

Tuesday, 10 April 2018

How to install GUI in rhel 7

Step 1

Need to check the available groups of YUM with following command.

yum group list

Loaded plugins: langpacks, product-id, subscription-manager
This system is not registered to Red Hat Subscription Management. You can use subscription-manager to register.
There is no installed groups file.
Maybe run: yum groups mark convert (see man yum)
Available environment groups:
Minimal Install
Infrastructure Server
File and Print Server
Basic Web Server
Virtualization Host
Server with GUI


it will show result like this. We need GUI it will listed in that group.

Step 2

Now need to install the GUI group with following command.

yum groupinstall 'Server with GUI' -y
it will install all the required dependencies and packages.

After installation complete just check the targets. In rhel 7 run levels called as targets.


systemctl get-default

it will show the result as below

multiuser.target

Now modify the targets to graphical.target, for that do the following steps.

systemctl enable graphical.target --force

rm /etc/systemmd/system/default.target

ln -s /usr/lib/systemd/system/graphical.target /etc/systemd/system/default.target


Now verify the current target

systemctl get-default

it will show like

graphical.target

Step 3

Reboot the server and check.


Monday, 19 March 2018

How to install Joomla in rhel 7

For internal knowledge sharing the local blog server is installed and configured.

Step 1

If it's a fresh server then update once.

yum update -y

then start installed required dependencies packages for that.

yum install httpd mysql-server php php-mysql php-curl php-gd php-pear php-memcache php-pspell php-snmp php-xmlrpc -y

Now start the service and enable it to start automatically in reboot.

systemctl start httpd ; systemctl enable httpd

systemct start mysqld ; systemctl enable mysqld

Step 2

Configure the mysql with following command with your requirement.

mysql_secure_installation

then create a database and user in mysql

mysql -u root -p

create database joomla;

create user joomla@localhost identified by 'Joomla@123';

grant all privileges on joomla.* to joomla@localhost;

flush privileges;

exit

Step 3

Download the package of Joomla from this link

 wget http://joomla addresss/file.zip

now unzip the files to /var/www/html

unzip Joomla_3-8.6-stable-full_package.zip -d /var/www/html/

Now change the owner to apache for all the files.

chown apache:apache /var/www/html/ -R

chmod -R 775 /var/www/html/

Now restart the httpd service.

systemctl restart httpd

Step 4

Open the url in your browser

http://192.168.0.1


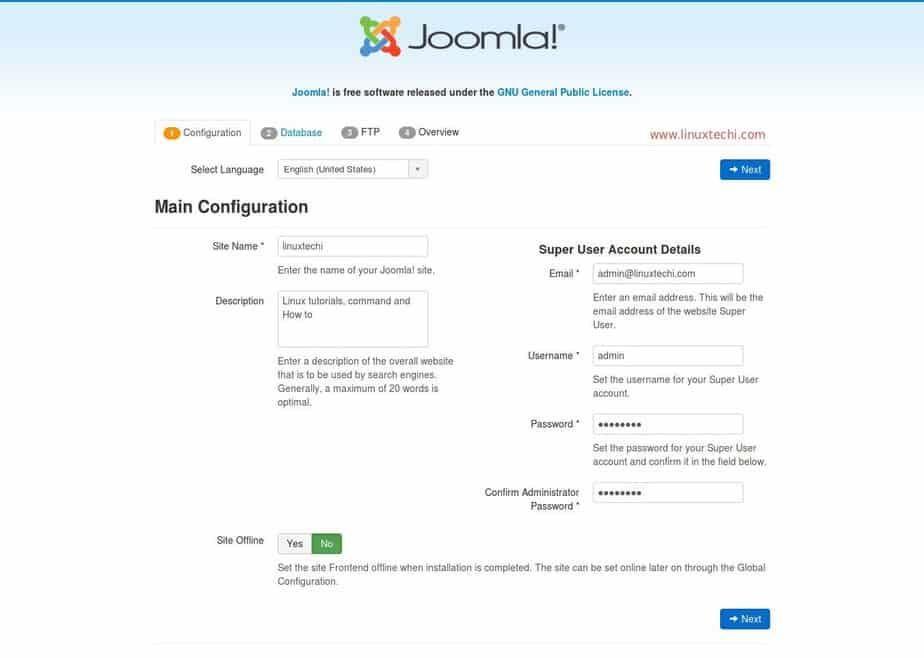
 Fill all the required and click next


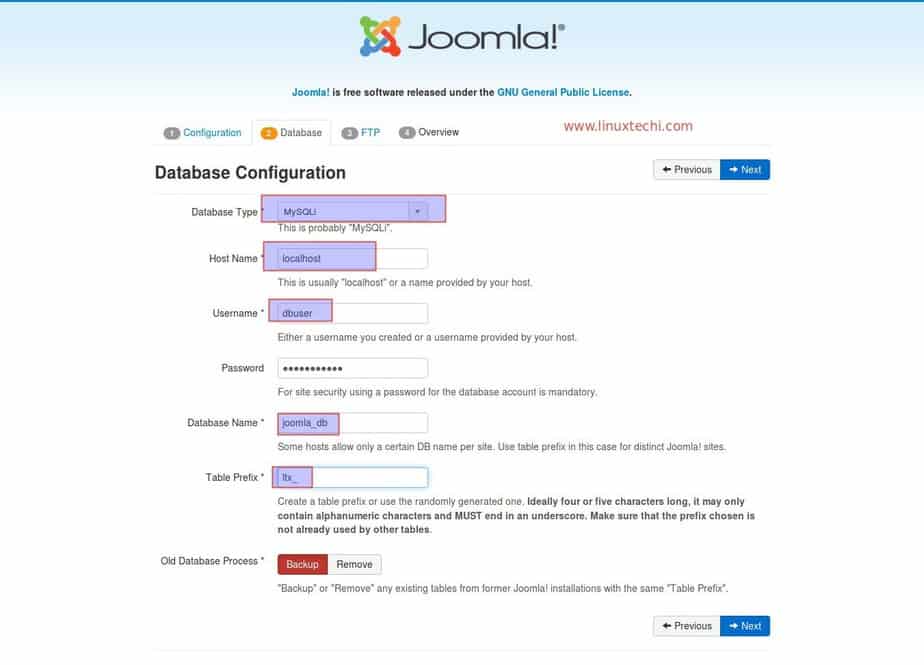
 Fill the DB details and click next


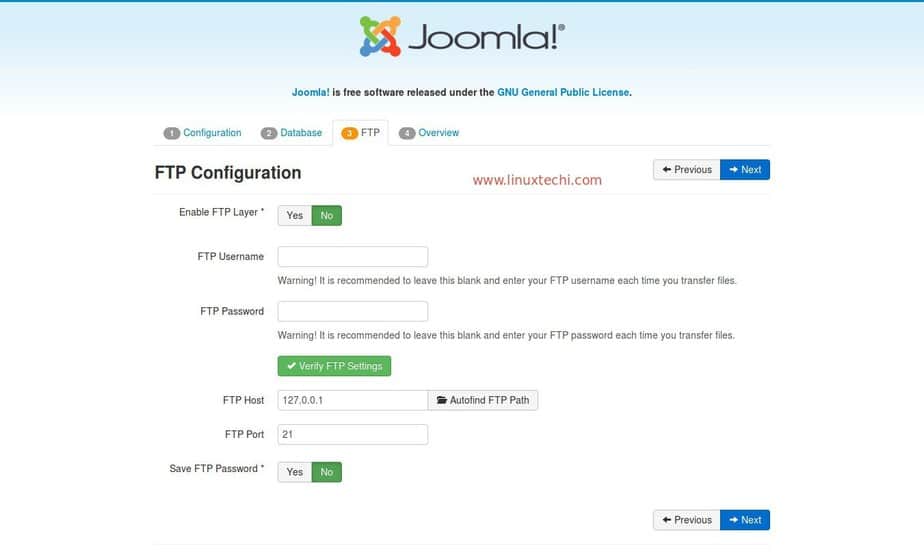
 If required fill or else click next


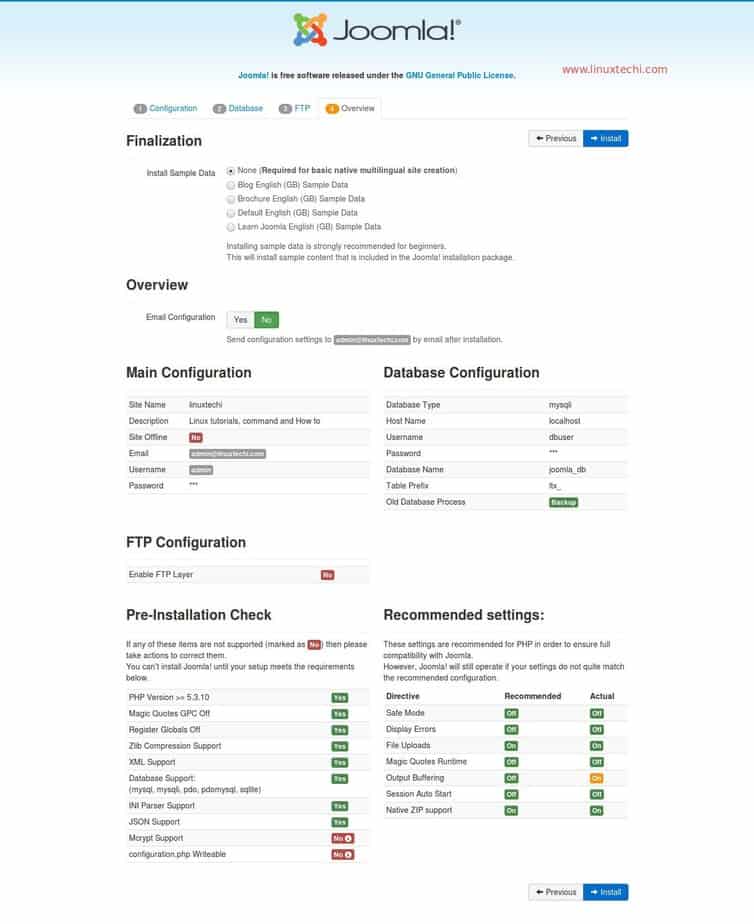
Now if you want sample data click any of that your choice or else click install


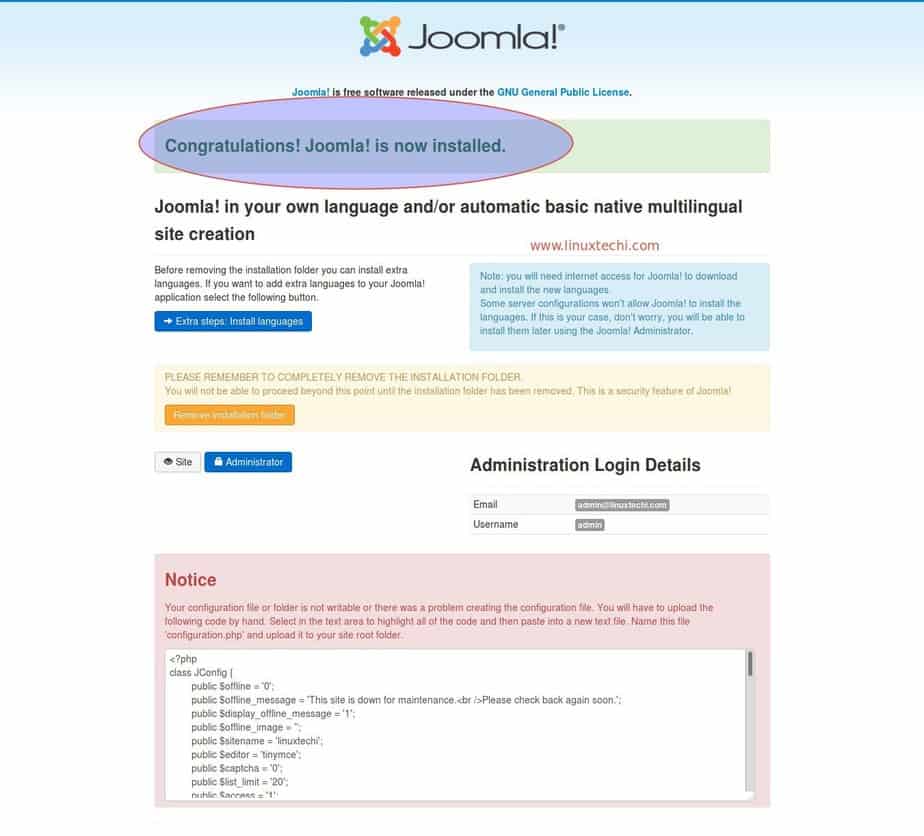
After this click remove installation folde and click Administrator button that shows in locked symbole.

That's all you can start using your blog.

Helm installation on rhel 9

 You can do install with 2 commands  first one is curl -fsSL -o get_helm.sh https://raw.githubusercontent.com/helm/helm/main/scripts/get-hel...